


Android Automotive OS is receiving far more recognition as automotive providers are looking to provide their prospects with a much more personalized knowledge. Right here we share our manual to setting up the initially app for AAOS.
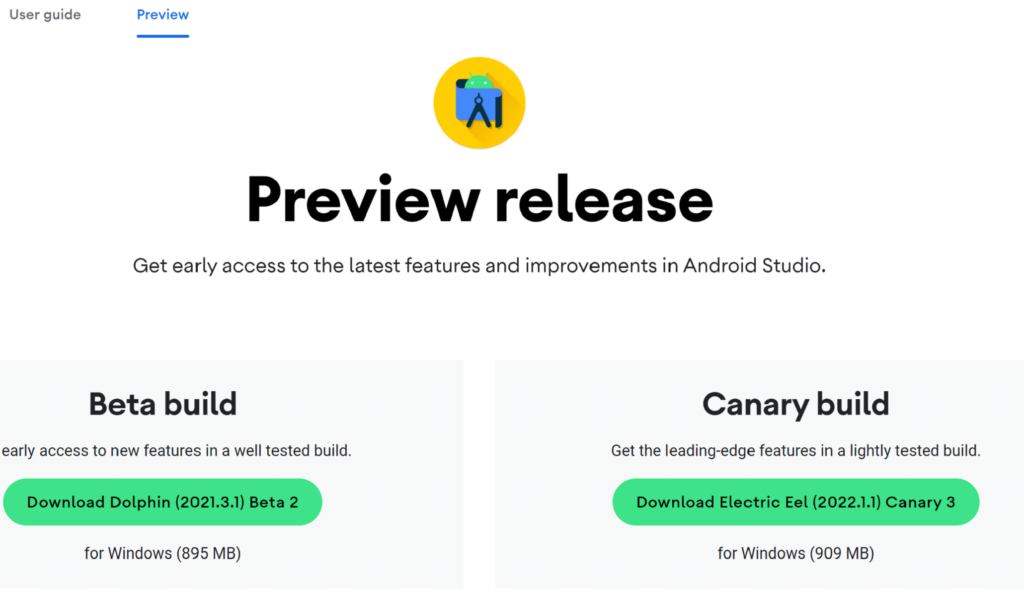
Right before you get started, go through our to start with write-up about AAOS and get to know our review to be aware of what to be expecting. Let us consider building a simple Hello Earth app for android automotive. To get an IDE, go to Android Studio Preview | Android Developers and get a canary construct:
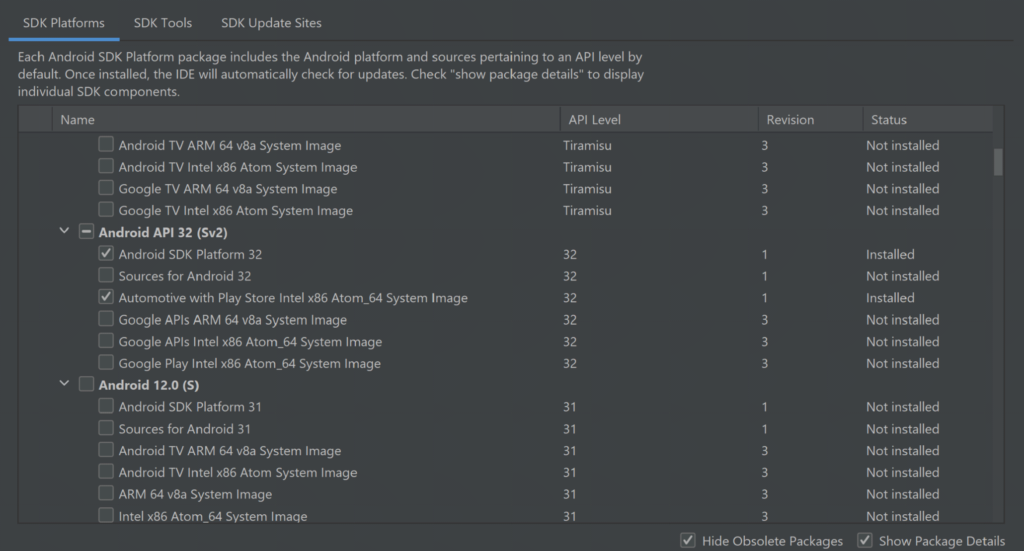
In the subsequent action, put together SDK, test and down load the Automotive method image in SDK supervisor. You can get any from api32, Android 9, or Android 10, but I do not recommend the most recent just one as it is very laggy and crashes a good deal proper now. There are also Volvo and Polestar pictures.
For those you need to have to increase one-way links to SDK Update Web pages:
https://developer.volvocars.com/sdk/volvo-sys-img.xml
https://developer.polestar.com/sdk/polestar2-sys-img.xml
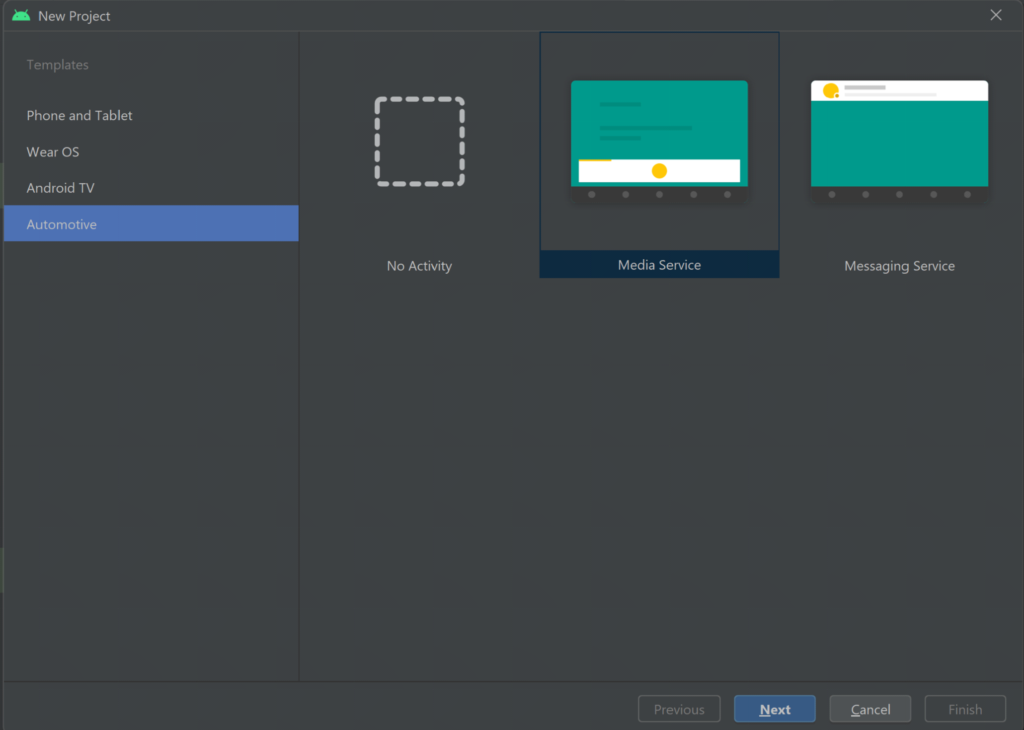
Start out a new task, go to File> New Undertaking and choose automotive with no action
A awesome and clean up undertaking must be designed, without the need of any lessons: Go to make.gradle and incorporate the auto application library into dependencies, refresh the job to make it get
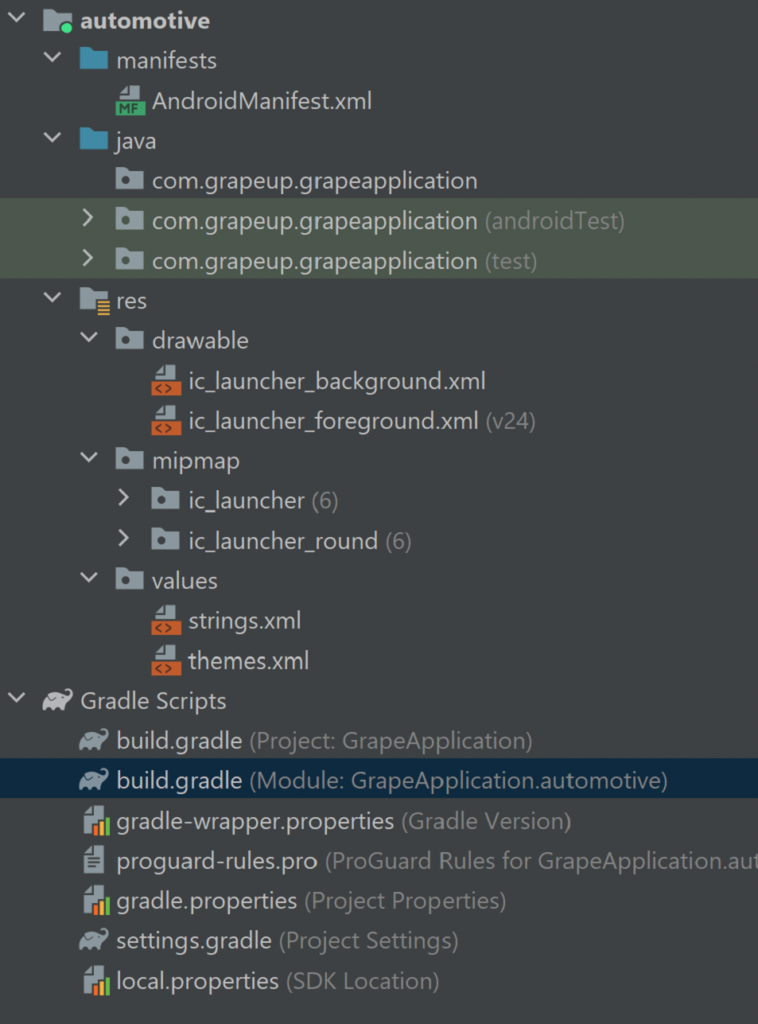
our new dependency:
implementation "androidx.car.app:application-automotive:1.2.-rc01"
Let us create some code, initial our display course. Identify it as you want and make it prolong Screen class from android.automobile.application package and make it employ required approaches:
community course GrapeAppScreen extends Screen

   general public GrapeAppScreen(@NonNull CarContext carContext)
       tremendous(carContext)


   @NonNull
   @Override
   public Template onGetTemplate()
       Row row = new Row.Builder()
.setTitle("Thats our Grape App!").develop()

       return new PaneTemplate.Builder(
               new Pane.Builder()
                       .addRow(row)
                       .develop()
       ).setHeaderAction(Motion.App_ICON).construct()
That should really create a basic monitor with our icon and title, now build yet another course extending CarAppService from the same bundle and as well make it put into action the required strategies. From createHostValidator() technique return a static one particular that allows all hostnames for the objective of this tutorial and return brand name new session with our display in onCreateSession(), pass CarContext utilizing Session course getCarContext() system:
public course GrapeAppService extends CarAppService

   general public GrapeAppService()

   @NonNull
   @Override
   public HostValidator createHostValidator()
       return HostValidator.Allow_ALL_HOSTS_VALIDATOR


   @NonNull
@Override
general public Session onCreateSession()
   return new Session()
       @Override
       @NonNull
       general public Monitor onCreateScreen(@Nullable Intent intent)
           return new GrapeAppScreen(getCarContext())
Up coming, transfer to AndroidManifest and increase many features inside the primary manifest tag:
Within the Application tag incorporate our company and action, do not forget minCarApiLevel as absence of this will toss an exception on app get started:
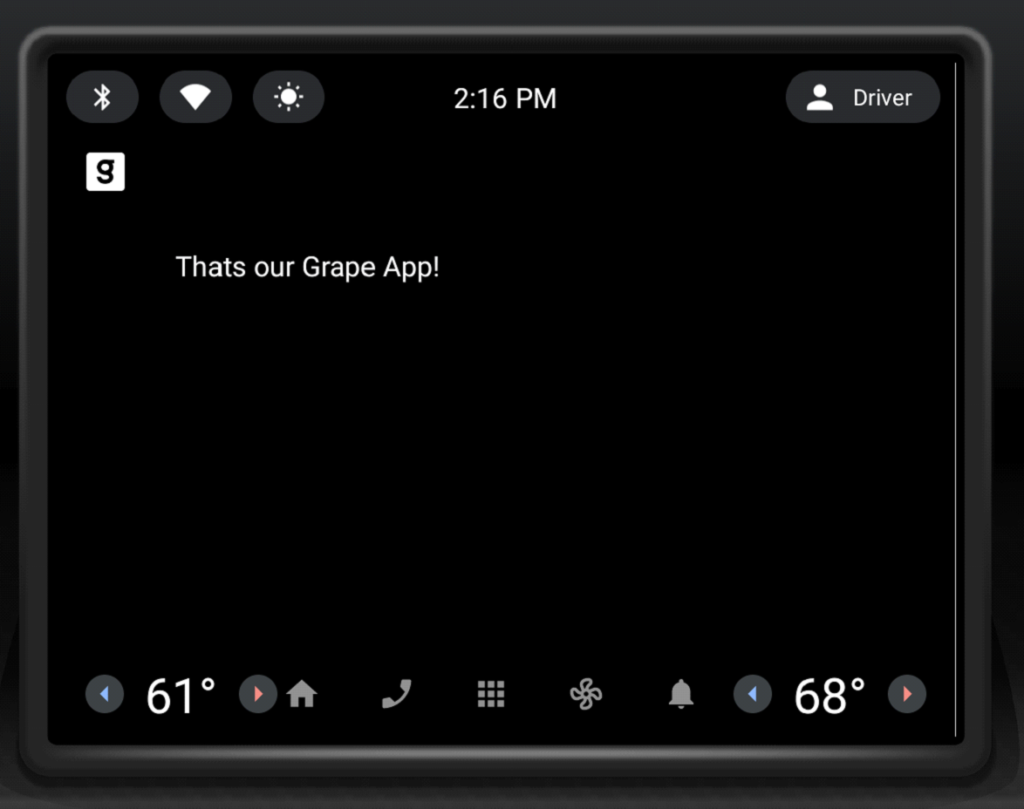
Now we can upload our software to the device, verify that you have an automotive emulator designed, use automotive configuration, and strike run. The application is run in Google Automotive Application Host, so if it is your very first software on this device, it may perhaps call for you to get to the play store and get it.

That is how it appears to be like:
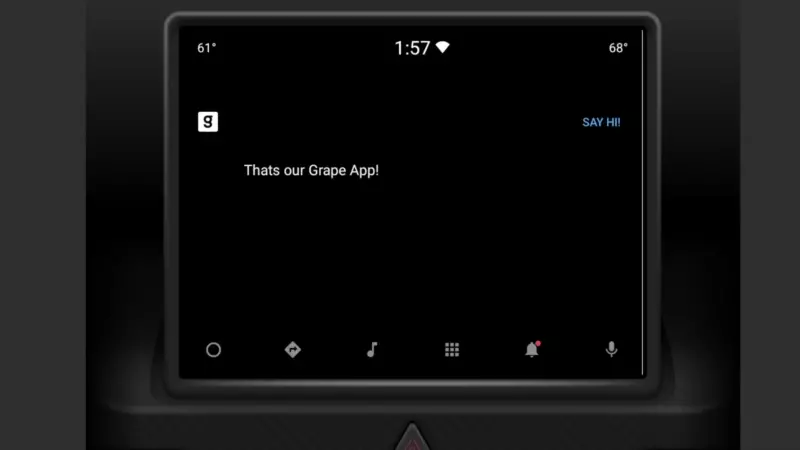
The final detail, we’ll insert a navigation button that will pop a Toast. Modify onGetTemplate() in Display screen course, add Motion and ActionStrip:
Action motion = new Action.Builder()
       .setOnClickListener(
               () -> CarToast.makeText(getCarContext(), "Hello!", CarToast.Size_Small).present())
       .setTitle("Say hello!")
       .develop()

ActionStrip actionStrip = new
Increase it to PaneTemplate:
return new PaneTemplate.Builder(
       new Pane.Builder()
               .addRow(row)
               .create()
)       .setActionStrip(actionStrip)
       .setHeaderAction(Motion.Application_ICON)
       .make()
Which is our HelloWorld application:
Now you have the HelloWorld illustration application up and jogging applying Car or truck Application Library. It normally takes care of displaying and arranging everything on the display screen for us. The only duty is to insert screens and actions we would like to have(and a little bit of configuration). Look at the Car application library to take a look at far more of what can be finished with it, play around with developing your application, and unquestionably verify our website shortly for far more AAOS app generation information.
More Stories
How Mobile Application Development Can Benefit The Rural Customer?
How to Complete a Job Application Form
Laravel Application Development: 5 Hacks To Get It Done